These instructions are loosely based on a Russian book published in 1962. I have made some changes to make them easier to follow. All measurements are in Centimetres.
How to follow the instructions
- Read the whole set of instructions from beginning to end.
- Start by noting down your measurements.
- Download the spreadsheet with the formulas. Follow the link to a google sheets copy, you can then add it to your own google drive, or download it and edit it on your computer. You can also write out the formulas on paper and calculate them manually. Double check all your measurements and calculations.
- You may find it easier to open this same web page in 2 browser windows side by side, so that you can see the instructions alongside the diagrams.
Tools
Paper for drafting, note paper, pencil, fine pen, rubber, tape measure, long ruler, French curve ruler, protractor.
Measurements
Description | Abbreviation | Measurement | Final |
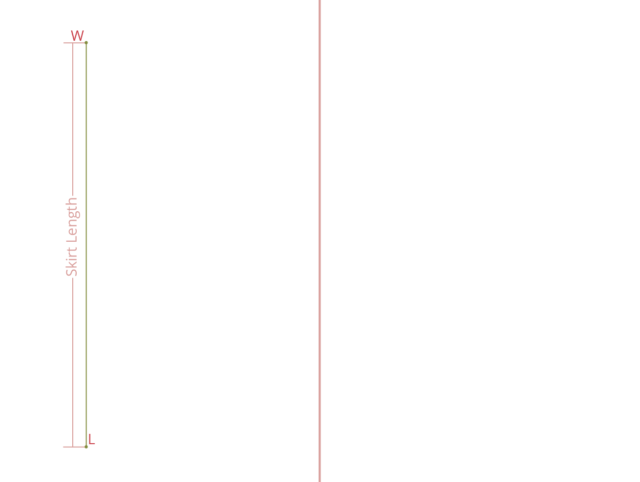
| Skirt Length Take from waist straight down the desired length. | (sl) | ||
| Waist Width Bend to the side – this is where your waist is. | (w) | w/2= | |
| Hip Width Measure loosely around the hips. This is on average 18 – 20cm. | (h) | h/2= | |
| Waist to Hips Measure from the centre front waist down to the hip line. | (wh) |
The Diagram
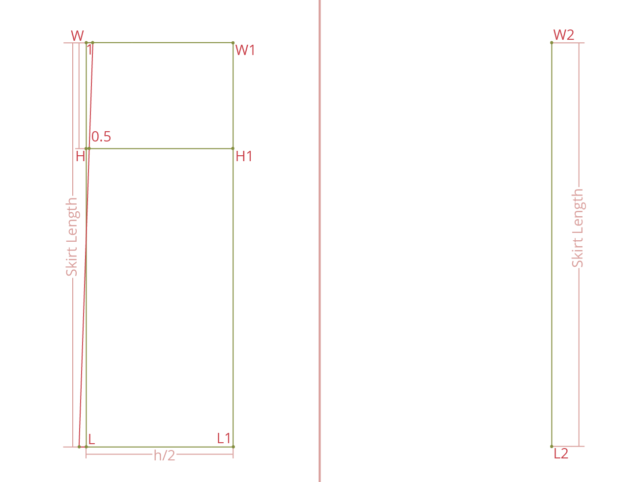
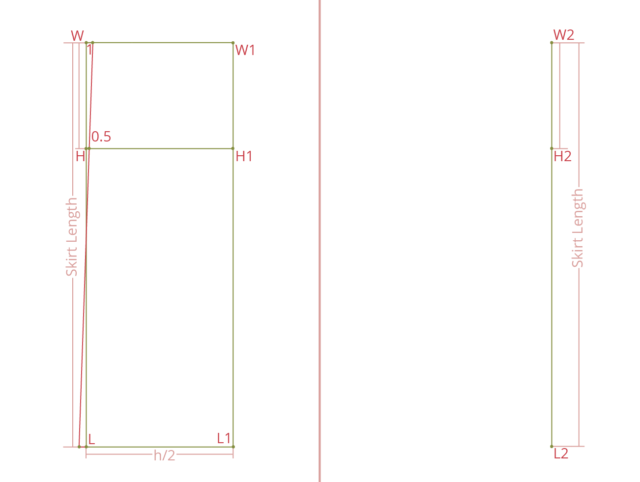
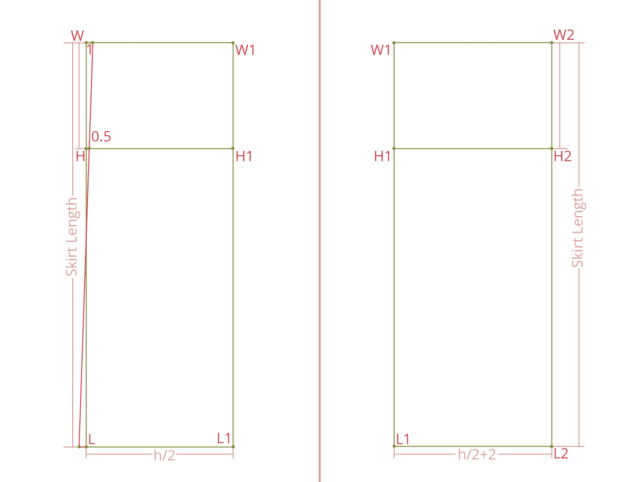
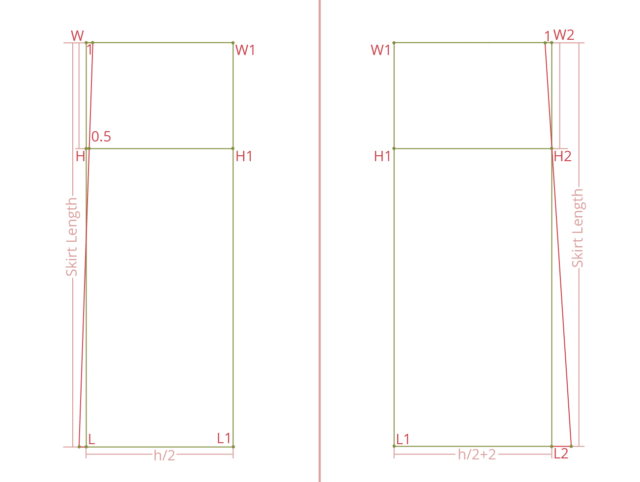
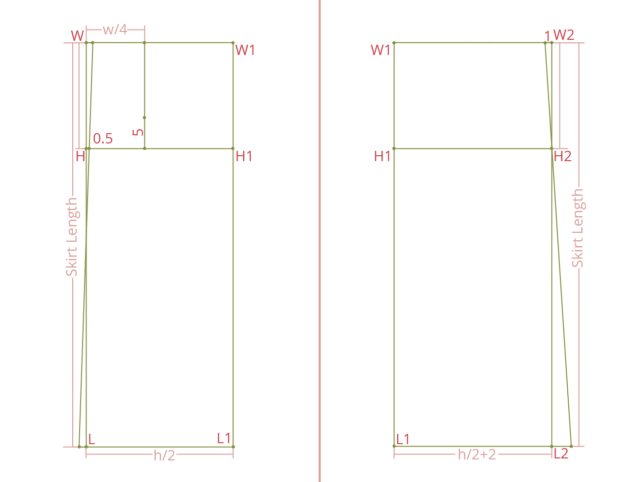
In this diagram, the pink lines are guideline measurements, green lines are helpful placeholders, red lines are the finished pattern. The back of the skirt is on the left, and the front of the skirt is on the right.
Paper area
For this draft, the skirt back is drafted on a separate piece of paper to the front. Check that you have enough area on your paper using this formula.
This includes space to add seam allowances.
Back = (h/2 + 10) by (sl + 5)
Front = (h/2 + 12) by (sl +5)
Back skirt length
Leave some space in the top left corner of the paper, and plot point W. Then draw a line the length of the skirt downwards from point W, label the end of this line L.
WL = sl
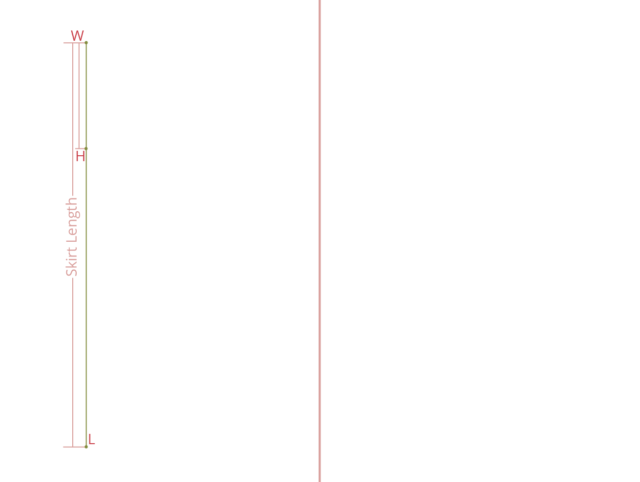
Back hip line
From point W, plot a point down along the line WL equal in length to the waist to hips measurement (wh). Label this point H.
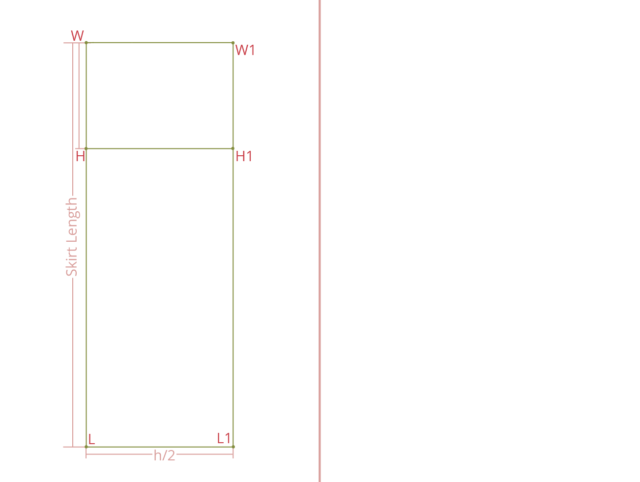
Back skirt width
From point H draw a horizontal line to the right, equal in length to the hip width divided in half. Label the end of this line H1. Then draw a line up and down from point H1 and plot points W1 and L1. Then join up these points to form a square.
HH1 = WW1 = LL1 = h/2
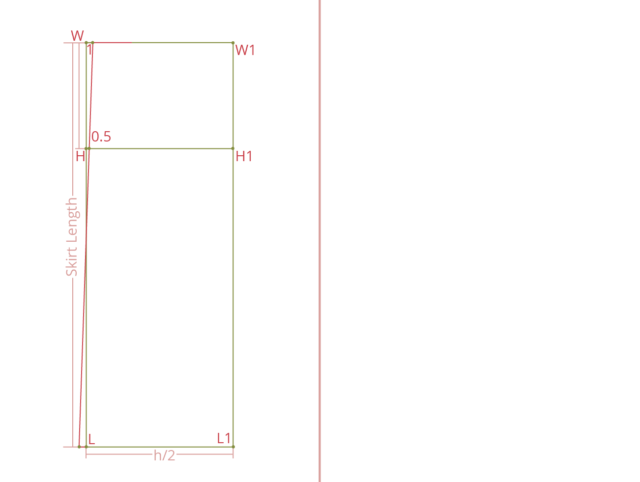
Centre back line
From point W, plot a point 1cm to the right. From point H, plot a point 0.5cm to the right. Join these two points with a straight line, and continue this line until the skirt length line LL1. This is the skirt centre back line.
Front skirt length
On a new piece of paper, leave some space in the top right corner of the paper, and plot point W2. Then draw a line the length of the skirt downwards from point W2, label the end of this line L2.
WL = W2L2 = sl
Front hip line
From point W2, plot a point down along the line W2L2 equal in length to the waist to hips measurement (wh). Label this point H2.
Front skirt width
From point H2 draw a horizontal line to the left, equal in length to the hip width divided in half plus 2. Label the end of this line H1. Then draw a line up and down from point H1 and plot points W1 and L1. Then join up these points to form a square.
H1H2 = W1W2 = L1L2 = h/2 + 2
Centre front line
From point W2, plot a point 1cm to the left. Join this point up with point H2 and continue this line until the skirt length line L1L2. This is the skirt centre front line.
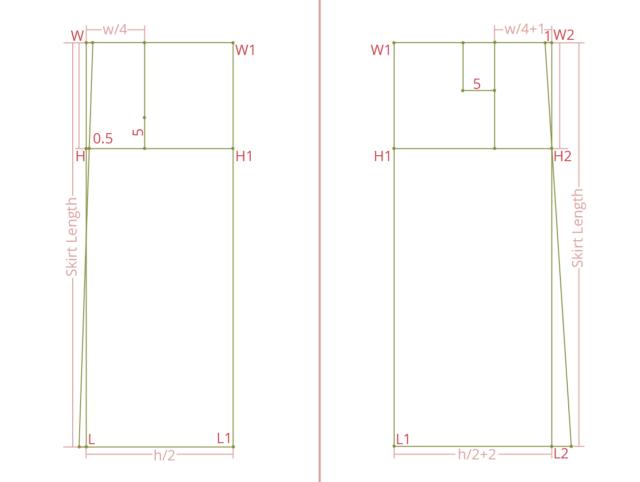
Back waist dart
To find the centre of the back waist dart, plot a point to the right of point W equal in length to one quarter of the waist width.
w/4
From this point, draw a vertical line down to the hip line. This line should be perpendicular to the waist and hip lines. Mark a point on this line 5cm up from the hip line.
Front waist dart
Plot a point to the left of the point W2 equal in length to one quarter of the waist width plus 1.
w/4 + 1
From this point, draw a vertical line down to the hip line. This line should be perpendicular to the waist and hip lines. Mark a point on this line 10cm down from the waist line. Then draw a 5cm perpendicular horizontal line to the left, and square up to the waist. This is the centre line of the second front waist dart.
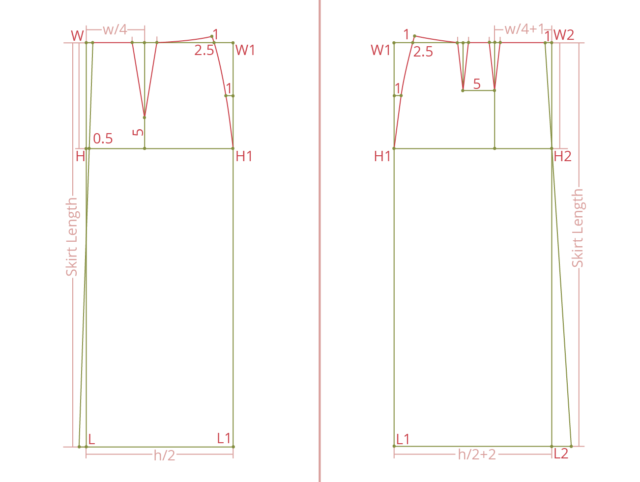
Calculating the dart widths
The sum of the total dart widths is the difference between the waist and hip measurement plus 1.
(h + 1) – w
Then this difference is distributed between the back dart, 2 front darts and the side hip “dart”. The side hip “dart” becomes the side seam.
The distribution is as follows:
One half to the side: ((h + 1) – w) / 2
One third to the back: ((h + 1) – w) / 3
One quarter to the two front darts (or one eighth to each front dart): (((h + 1) – w) / 4) / 2
Now add up these dart distributions again to check if they match the original difference of (h + 1) – w. If they do not, then subtract the difference between the original dart sum and the new dart sum into each dart until they do.
For example:
Original dart sum = 11.2
Side = 5.6
Back = 3.7
Front = 2.8 (or 1.4 * 2)
New dart sum = 12.1
Difference between dart sums is 0.9. Split this amount into the 3 dart values. It is easier to make all the values even in the new distributions: 0.4, 0.3, 0.2.
New values:
Side = 5.6 – 0.4 = 5.2
Back = 3.7 – 0.3 = 3.4
Front = 2.8 – 0.2 = 2.6 (or 1.3 each)
New dart sum = original dart sum = 11.2
Drawing the darts
Half the front and back dart values, and draw the dart legs either side of the dart centre lines.
For the side dart, from points W1 mark points inwards equal in length to half the side dart distribution. Draw 1 cm horizontal lines inwards at the half way points on lines W1H1.
Using a curve ruler, join up the side dart points, 1 cm points and points H1. Extend this curve 1cm above the waist line.
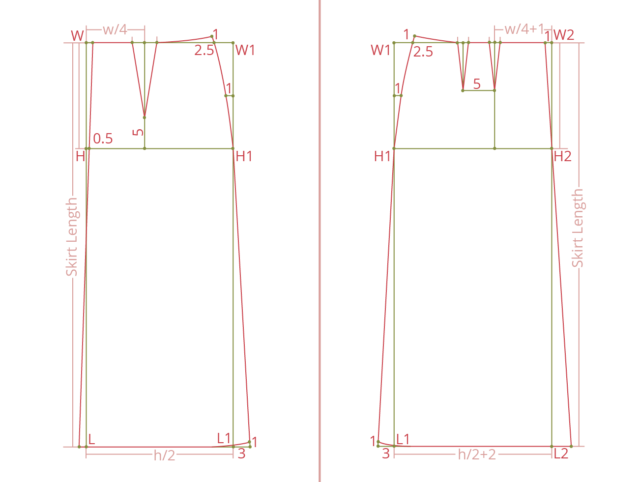
Finishing waist and hem
Using a curve ruler, join the outer dart legs to the 1cm extended side curve points on the front and back.
For the hem, at point L1, extend the horizontal line outwards by 3cm. Then from this extension, mark points 1cm upwards. Join up points H1 to 1. Then use a curve to join points 1 to the hem lines LL1 and L1L2.
The next steps
Now add your seam allowances.
To allow for more movement in the skirt, you can add a kick pleat to the centre back, or even to the side seams.
You can also consider playing around with the darts – adding a second dart to the back or taking away the second front dart.